vue-vant移动端项目
- 基于
vue cli3创建vue项目
先查看本机有没有安装NodeJS
win + R 进入控制台

输入 node -v 查看 node版本信息
1
2
3
2
3
如果有版本号,则说明已安装,否则需安装 NodeJS
再安装Vue Cli
npm install -g @vue/cli
1
1、再通过vue cli3的图形化操作界面,创建项目
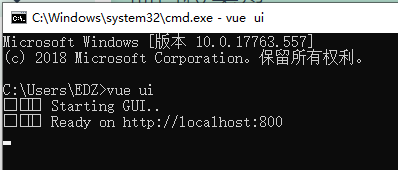
1、在控制台输入命令 vue ui 进入图形化页面
2、按步骤创建项目
1
2
2
2、通过传统方式创建项目
- 创建完后通过
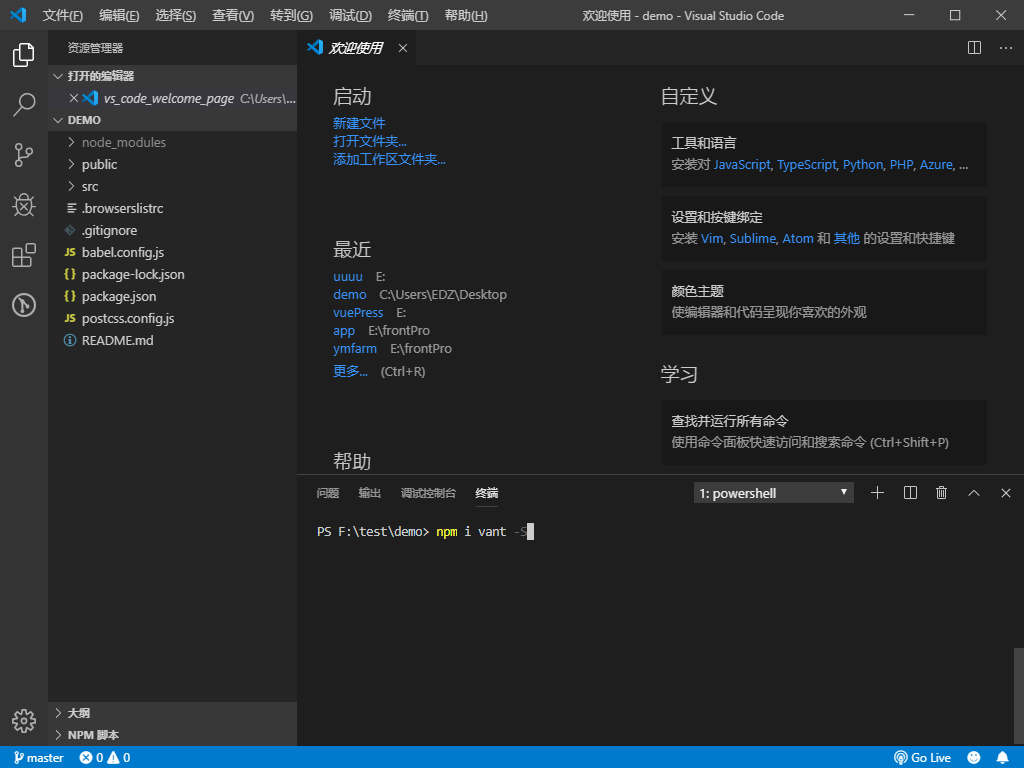
VScode 编辑器打开项目,安装Vant ui
在VScode中,通过 Ctrl + ~ 组合键打开 终端

输入
npm i vant -S
安装vant
1
2
3
4
5
2
3
4
5
- 配置
babel.config.js文件,完成按需引入组件功能
module.exports = {
    presets: [
        '@vue/cli-plugin-babel/preset'
    ],
    plugins: [
        ['import', {
            libraryName: 'vant',
            libraryDirectory: 'es',
            style: true
        }, 'vant']
    ]
}
1
2
3
4
5
6
7
8
9
10
11
12
2
3
4
5
6
7
8
9
10
11
12
- 引入
vant组件测试
首先安装模块插件:
npm i babel-plugin-import -D
1
ps:babel-plugin-import 是一款 babel 插件,它会在编译过程中将 import 的写法自动转换为按需引入的方式
引入组件方式有两种:
方式一: 在main.js文件中引入,全局使用
import { Toast,Button } from 'vant'
Vue.use(Toast).use(Button)

<van-button type="default">默认按钮</van-button>

此方法引入的Toast组件,使用方式:
this.$toast({
    message: 'test info',
    duration: 1000,
    forbidClick: true
});
1
2
3
4
5
6
7
8
9
10
11
2
3
4
5
6
7
8
9
10
11
方式二: 在页面单独引用,仅作用于此页面
<template>
  <div>
    <van-button type="default">默认按钮</van-button>
  </div>
</template>

<script>
    import { Button } from 'vant';
    import { Popup } from 'vant';
    export default {
        components:{
            [Button.name]:Button,
            [Popup.name]:Popup
        }
    }
</script>
1
2
3
4
5
6
7
8
9
10
11
12
13
14
15
16
2
3
4
5
6
7
8
9
10
11
12
13
14
15
16
- 运行项目
npm run serve
1
成功启动后如下图:

- 解决移动端适配问题
安装对应插件
npm i postcss-pxtorem -S
npm i amfe-flexible -S
1
2
2
- 新建
vue.config.js,引入插件,进行相关配置(用下面新的方式)
//旧
const autoprefixer = require('autoprefixer');
const pxtorem = require('postcss-pxtorem');

module.exports = {
  css: {
    loaderOptions: {
      postcss: {
        plugins: [
          autoprefixer({
            browsers: ['Android >= 4.0', 'iOS >= 7']
          }),
          pxtorem({
            rootValue: 37.5, /*37.5对应的是375尺寸的图,如果是750尺寸的图则替换成75,以此类推*/
            propList: ['*'],
          })
        ]
      }
    }
  },
};
1
2
3
4
5
6
7
8
9
10
11
12
13
14
15
16
17
18
19
20
21
2
3
4
5
6
7
8
9
10
11
12
13
14
15
16
17
18
19
20
21
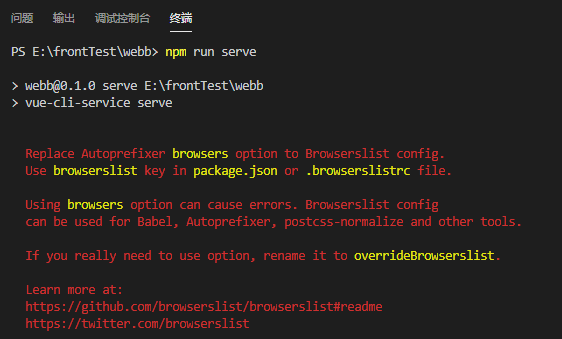
以上导入方式会在控制台报下图警告,原因是版本高了,引用有修改,所以按提示修改如下:
- 新修改的方式(将 plugins 中的 browsers 修改成 overrideBrowserslist )
//新
const autoprefixer = require('autoprefixer');
const pxtorem = require('postcss-pxtorem');

module.exports = {
  css: {
    loaderOptions: {
      postcss: {
        plugins: [
          autoprefixer({
            overrideBrowserslist: [
              "Android 4.0",
              "iOS 7",
              "Chrome > 31",
              "ff > 31",
              "ie >= 8"
            ] //将 browsers 修改成 overrideBrowserslist 即可
          }),
          pxtorem({
            rootValue: 37.5, /*37.5对应的是375尺寸的图,如果是750尺寸的图则替换成75,以此类推*/
            propList: ['*'],
          })
        ]
      }
    }
  },
};
1
2
3
4
5
6
7
8
9
10
11
12
13
14
15
16
17
18
19
20
21
22
23
24
25
26
27
2
3
4
5
6
7
8
9
10
11
12
13
14
15
16
17
18
19
20
21
22
23
24
25
26
27
main.js文件中导入amfe-flexible
import 'amfe-flexible'
1
index.html配置移动端meta信息
<meta name="viewport" content="width=device-width, initial-scale=1, maximum-scale=1, minimum-scale=1, user-scalable=no">
1